
Double Seam Teardown Guide: Body Hook, End Hook and Overlap
At the start of every shift, a quality control technician at a fish cannery zeros their seam micrometer and prepares to run a teardown. They are not merely filling out a logging sheet; they are auditing the container's hermetic seal—the single physical barrier that prevents microleakage and protects the sterile product from post-process pathogen ingress. The double seam is a highly engineered mechanical joint formed by folding the can body hook and the cover hook (end hook) together with a rubber sealing compound in between. Under US FDA 21 CFR Part 113 and the FDA Container/Closures Guide, visual seam inspections are required every 30 minutes for each seamer pocket, and full destructive teardown inspections are required at least every 4 hours. On modern industrial canned fish production lines, mastering the teardown measurement is the foundation of an audit-proof food safety program.
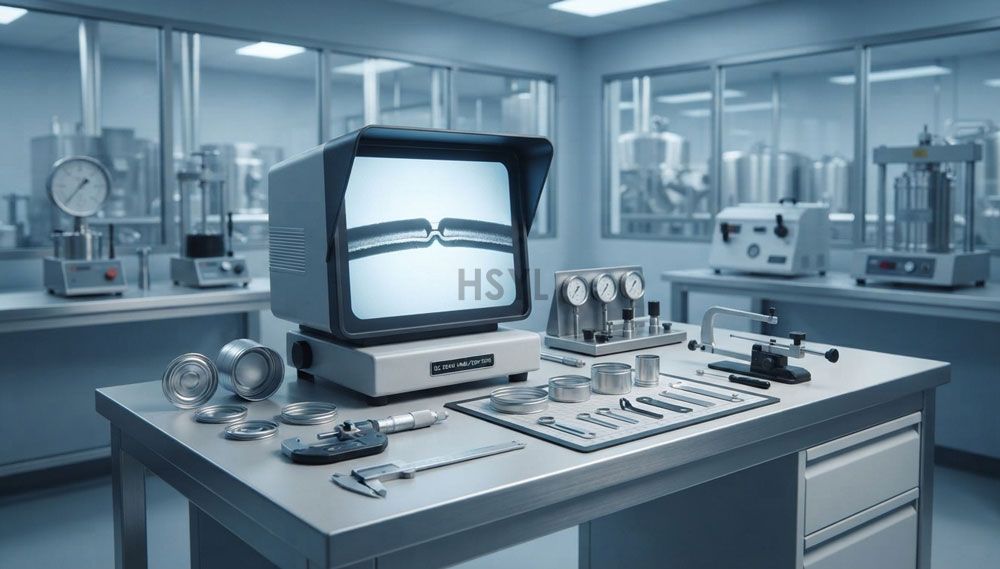
This article provides an operational guide to executing and reading a double-seam teardown. It details the geometry of the double seam, the step-by-step destructive testing process, the calculations for overlap and tightness, and how to visually evaluate the pressure ridge to identify seamer roll misalignments.
The Anatomy of a Double Seam
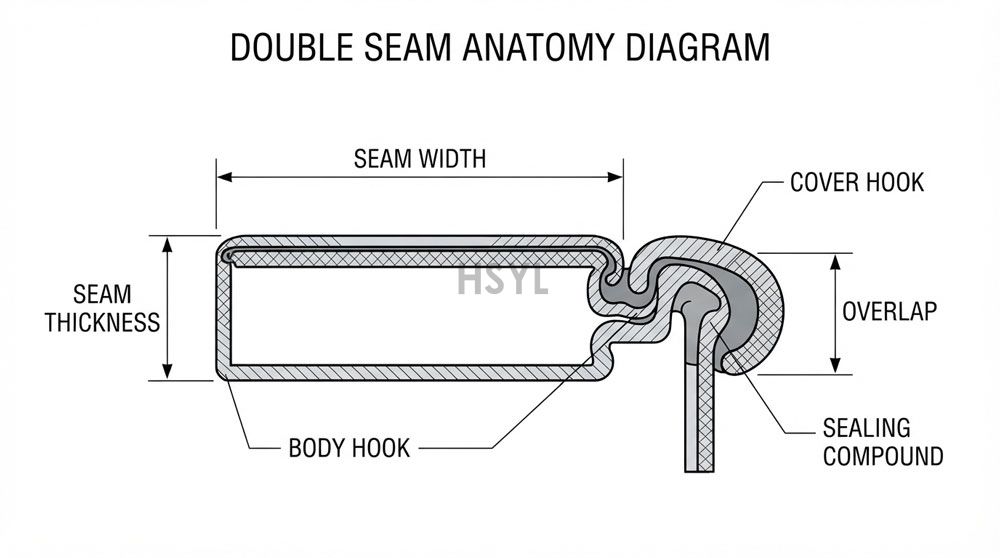
To analyze a double-seam teardown, one must first understand its structural components. A double seam consists of three layers of cover metal and two layers of body metal folded together. When cut and viewed under a microscope, or peeled apart during a teardown, the seam presents several critical parameters that must be measured and recorded:
- Body Hook (BH): The folded edge of the can body that is bent downward during the seaming process.
- Cover Hook (CH) or End Hook: The folded edge of the can end (cover) that is bent upward inside the body hook.
- Overlap (OL): The distance that the body hook overlaps the cover hook. This is the primary measure of the seam's mechanical strength.
- Seam Width (W) or Seam Height: The maximum external vertical dimension of the double seam.
- Seam Thickness (T): The maximum external horizontal dimension of the double seam. It reflects the degree of compression of the layers.
- Countersink (CS): The depth from the top edge of the double seam to the can end panel.
- Body Hook/Cover Hook Thickness (BH_t / CH_t): The raw metal thicknesses of the can body and can cover.
Inside the double seam, a synthetic rubber or elastomer sealing compound is pre-applied to the flange of the can end. When the seaming rolls compress the seam, this compound is squeezed into the microscopic voids between the hooks, creating a hermetic seal. Without proper compression and hook interlock, the compound cannot seal these channels.
The Step-by-Step Destructive Teardown Procedure
A double-seam teardown is a destructive test that must be executed methodically to avoid deforming the hooks, which would result in inaccurate measurements. The standard quality control procedure consists of four stages:
Stage 1: External Measurements
Before cutting the can, use a specialized can seam micrometer to measure the Seam Width (W), Seam Thickness (T), and Countersink (CS) at a minimum of three positions around the can circumference (typically 120 degrees apart, avoiding the side-seam junction for three-piece cans).
Stage 2: Cutting the Can Panel
Using a heavy-duty can opener or a circular can cutter, remove the center panel of the can end, leaving a narrow rim (approximately 5 mm) of the cover panel attached to the double seam. This exposes the inside of the can body while keeping the seam structure intact.
Stage 3: Cutting the Seam Cross-Section
If using an optical seam projector, use a fine-blade seam saw to cut a thin cross-sectional slice out of the seam. If performing a manual teardown, use a pair of end-cutting nippers to cut through the outer lip of the seam. Cut carefully to prevent twisting or flattening the metal.
Stage 4: Peeling the Cover Hook (The Teardown)
Using pliers, grip the inner cut edge of the cover rim and peel it downward and away from the double seam. Peel the metal rim circumferentially around the can. The cover hook will separate from the body hook, leaving the body hook fully exposed on the can body. The peeled cover hook is then collected for visual wrinkle inspection.
Core Safety Metrics: Overlap and Tightness
Once the hooks are separated, the QA technician must calculate the overlap and grade the cover hook tightness. These two metrics determine whether the double seam will withstand the high pressures of retort sterilization and cooling.
Calculated Overlap
Overlap can be measured directly using an optical seam projector, or calculated mathematically from the micrometer measurements. The standard formula for calculated overlap is:
Overlap = BH + CH + t - W
Where: BH is the Body Hook length, CH is the Cover Hook length, t is the Cover Metal Thickness (obtained from the can supplier's spec sheet), and W is the Seam Width.
For example, if a can has a Body Hook of 1.40 mm, a Cover Hook of 1.35 mm, a Cover Thickness of 0.22 mm, and a Seam Width of 3.00 mm, the calculated overlap is:
Overlap = 1.40 + 1.35 + 0.22 - 3.00 = 0.97 mm
The minimum acceptable overlap is typically 1.00 mm for standard cans, or 0.85 mm for small container sizes (verify the specific threshold with your can manufacturer). If the overlap is too low, the hooks will not interlock sufficiently, and the container may leak when subjected to internal pressure during retorting.
Tightness (Wrinkle Rating)
Tightness is a measure of how tightly the cover hook is compressed against the body hook. It is determined by inspecting the inner edge of the peeled cover hook for wrinkles. During the first operation of seaming, the flat cover flange is rolled inward, creating wrinkles. During the second operation, the seaming roll compresses these wrinkles flat. Tightness is rated based on the percentage of the cover hook height that remains wrinkled:
| Wrinkle Grade | Visual Appearance | Tightness Percentage | QA Status |
|---|---|---|---|
| Grade 0 (No Wrinkle) | Smooth cover hook edge, no visible waves | 100% Tightness | Excellent |
| Grade 1 (Faint Wrinkle) | Slight, shallow waves extending up to 25% of the hook height | 75% – 90% Tightness | Acceptable |
| Grade 2 (Medium Wrinkle) | Visible wrinkles extending up to 50% of the hook height | 70% Tightness | Minimum Acceptable Limit |
| Grade 3 (Severe Wrinkle) | Deep wrinkles extending over 50% of the hook height | 50% – 60% Tightness | REJECT — Under-crimped seam; risk of leakage |
| Grade 4 (Uncompressed) | Deep, loose waves extending the full height of the hook | 0% – 40% Tightness | REJECT — Second operation roll failed to compress |
The Pressure Ridge Audit: Visual Inspection of Roll Pressure
The pressure ridge is a continuous, uniform impression formed on the inside wall of the can body directly opposite the double seam. It is created by the pressure of the second operation seaming roll pushing the can metal against the seaming chuck. Auditing the pressure ridge is a critical visual check during a teardown because it reveals the mechanical alignment of the seamer:
- Normal Pressure Ridge: A faint, continuous, and completely uniform indentation around the entire inner circumference of the can body. This indicates balanced and correct seaming roll pressure.
- Faint or Missing Ridge: Indicates insufficient roll pressure. The second operation roll is set too loose, which prevents the sealing compound from compressing properly, risking channel leaks.
- Excessive or Sharp Ridge: The roll pressure is set too tight. This can damage or cut the metal can body (causing fracture lines), deform the seaming chuck, and squeeze the sealing compound completely out of the seam.
- Uneven or Skipped Ridge: The indentation is visible in some areas but disappears in others. This indicates can body eccentricity, a worn seaming spindle, or a chipped seaming chuck.
To maintain high consistency, the seamer must be audited using precision automatic can sealing machines equipped with heavy-duty seaming chucks and wear-resistant roll profiles. During line commissioning or can size changeover, the seamer must be integrated with downstream canned food filling and sealing systems to ensure the feed rate and can positioning do not cause seam distortion.
Double Seam Teardown Log Template
Every fish cannery must document its double-seam teardown checks. The template below outlines the parameters that must be captured in the QA log sheet. Target values must be obtained from the container supplier's specification sheet.
| Parameter | Nominal Target Range | Measurement Instrument | Inspection Frequency | Record Action | Action on Deviation |
|---|---|---|---|---|---|
| Seam Width (W) | e.g., 2.90 – 3.10 mm | Specialized seam micrometer | Destructive: every 4 hours per pocket; Visual: every 30 minutes | Seam Inspection Log | Stop line, adjust 1st/2nd operation roll height, isolate prior production |
| Seam Thickness (T) | e.g., 1.20 – 1.35 mm | Specialized seam micrometer | Every 4 hours per pocket | Seam Inspection Log | Verify roll tightness, check for compound build-up on chuck |
| Countersink (CS) | e.g., 3.10 – 3.30 mm | Countersink depth gauge | Every 4 hours per pocket | Seam Inspection Log | Adjust seamer base plate height or lifter pressure |
| Body Hook (BH) | e.g., 1.30 – 1.50 mm | Optical seam projector / micrometer | Every 4 hours (destructive) | Seam Destructive Log | Adjust first operation seaming roll setting |
| Cover Hook (CH) | e.g., 1.30 – 1.50 mm | Optical seam projector / micrometer | Every 4 hours (destructive) | Seam Destructive Log | Adjust first operation seaming roll setting |
| Overlap (OL) | > 1.00 mm (or > 80% hook interlock) | Calculated or optical measurement | Every 4 hours (destructive) | Seam Destructive Log | Adjust seaming rolls to increase hook length and reduce width |
| Tightness (Wrinkle %) | > 70% tightness (Grade 2 or better) | Visual comparison after hook peel | Every 4 hours (destructive) | Seam Destructive Log | Tighten second operation seaming roll setting |
| Pressure Ridge | Normal / Faint (continuous, no sharp cut) | Visual inspection inside can body | Every 4 hours (destructive) | Seam Destructive Log | Adjust second operation roll pressure or check chuck wear |
Scope, Sources and Limitations
Scope. This guide covers the teardown inspection of double seams for metal food cans, including body hook, cover hook, overlap calculations, tightness/wrinkle grading, and pressure ridge auditing. It does not cover non-destructive leak testing, vacuum testing, can corrosion chemistry, or retort sterilization curves, which are covered in separate technical guides.
Limitations. The measurement ranges and tolerances mentioned in this article are typical industry references for steel food cans. Exact target dimensions and tolerances vary based on can size, shape (round vs. rectangular), material (steel vs. aluminum), and metal thickness. Seafood processors must obtain the official double-seam specification profile directly from the container manufacturer for each batch of cans run.
Source basis. Technical methodologies are aligned with the US FDA Container/Closures Guide (Guide to Inspections of Low-Acid Canned Food Manufacturers - Part 3), CFIA Metal Can Defects Manual (Chapter 2), US FDA 21 CFR Part 113, and standard training manuals published by the Institute for Thermal Processing Specialists (IFTPS).
Reviewer and date. Technical review completed on 2026-07-14 by the HSYL Fish Canning Engineering Team and QA Department. This document must be revised if FDA or CFIA double-seam inspection codes are updated.
Can Seaming and Quality Control Resources
To further support your factory's packaging QA system, the following resources provide technical specifications and design templates for related processing machinery:
- Automatic can sealing machines — detailed equipment records on seaming spindles, roll adjustments, and tooling configurations for round and oval cans.
- Canned food filling and sealing systems — details on the integration between rotary filling and automatic seaming lines to maintain seam alignment.
- Industrial canned fish production lines — the comprehensive plant design layout, detailing post-seaming can washers, conveyors, and retort transfer systems.
Frequently Asked Questions
What is the difference between visual and destructive seam inspections?
How is double seam overlap calculated from micrometer measurements?
What is the minimum acceptable double seam overlap for food cans?
How does cover hook wrinkle indicate double seam tightness?
What does a sharp or excessive pressure ridge indicate?
How do I perform a teardown on oval or rectangular fish cans?
Must-Read Blogs For Chain Restaurants Owner

 Spinach Canned Canned Food Canning Production Line
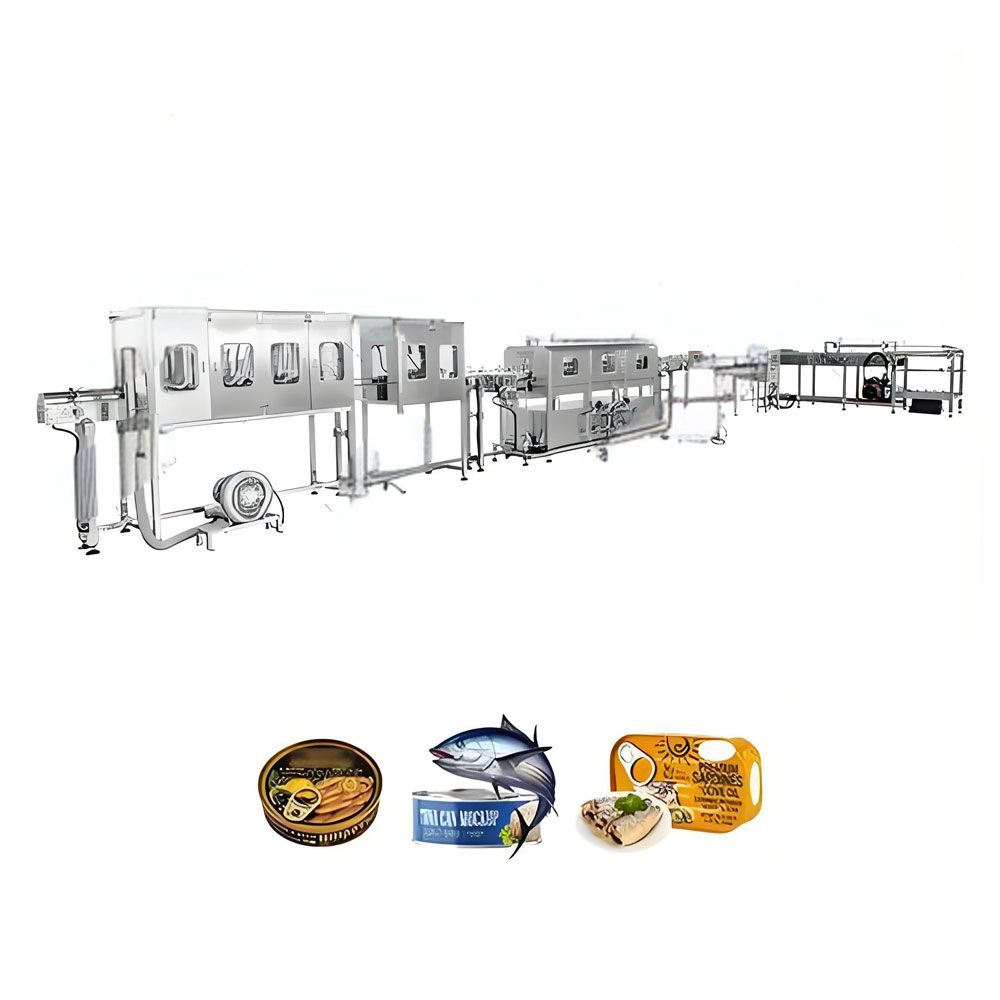 Canned Fish Production Line
Ready to Get Started?